Guide:Mapping
Creating a Custom Level in Carrion requires external tools. Instead of a simplified editor, the programs required to edit levels, scripts, modify sounds or textures and more are almost all available for free or given by the developers themselves.
The game does not have an in-game level editor, instead going for the free and open source Tiled. An external text editor is required to create simple scripts for connecting objects (switches to doors, for example). Textures can be added or modified with the SpritesheetEditor (included in Carrion Dev Tools), and Lua scripts can fill in the gaps when these tools cannot.
Creating a project
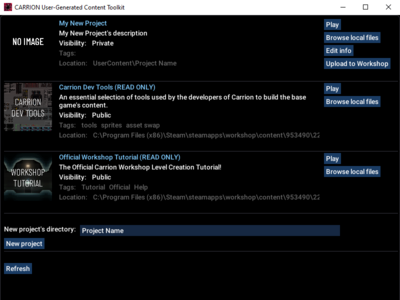
To create a project, go to Carrion's installation folder (C:\Program Files (x86)\Steam\steamapps\common\Carrion) or right click Carrion on the Steam Library, go to Manage > Browse local files and open UGCToolkit.exe.
In UGCToolkit, type the project's name in "New project's directory" and click "New project". If you have never created a project before, a "UserContent" folder will be created, where this and all future projects will be saved.
The new project is now saved in Carrion\UserContent\<projectname> ("Browse local files"), where all levels, scripts, templates and more are now located.
To modify the title, description, images and more, go to "Edit info".
It is highly recommended to change the "Save folder prefix" as to not load or overwrite other projects' save files. Saves can be found in %userprofile%\AppData\LocalLow\Phobia\Carrion (using the get_local_dir command in-game will also display the path).
Loading a level
When creating a project, a level named my_level.json is automatically created in UserContent\<projectname>\Levels. The level's name can be changed by renaming the JSON file. Spaces are not recommended, as they make the level unable to be loaded through console commands.
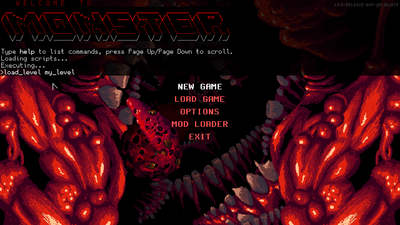
To load the level by pressing NEW GAME, make sure the level file matches the name in "First level" on UGCToolkit.
Levels can also be loaded with the load_level level_name (Regular/Play mode) and edit_level level_name (Editor/Free float mode) console commands. The Editor mode automatically reloads the level when it detects a saved change to the level or script files.
Debug Hotkeys allow for swapping between Play and Editor mode with F2 and F4. To enable debug hotkeys, use the command set_setting debug_hotkeys_enabled 1. For more information, see Debug Commands.
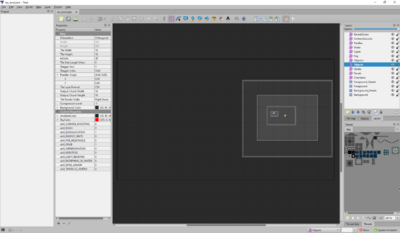
The automatically generated my_level.json contains a small chamber with a Hive, a Monster and a Light. To edit the level, open Tiled and either drag and drop or select the file with "Open File".
Editing a level
Levels are built on multiple layers, each containing specific types of objects and tiles. Placing an object that doesn't belong in that layer (e.g. a door on the "Lights" layer) will crash the game.
To find the cause of an error or crash, you can check the gamelog.txt file, found in %userprofile%\AppData\LocalLow\Phobia\Carrion.
Skills and Map properties
The skills available at the start of a level are set by the Map Properties. Skills not set by the Map Properties will not be overwritten.
Other map properties include AmbientColor and SkyColor, that set the colors of the ambient light and the background sky, respectively.
Editing tiles
Tiles are placed, in order, on:
 Foreground Details: Serves as decoration, has no collision.
 Foreground: The level collision.
 Background Details: Serves as decoration, has no collision (with a few exceptions).
 Background: The last layer before the Sky Color and background parallaxes.
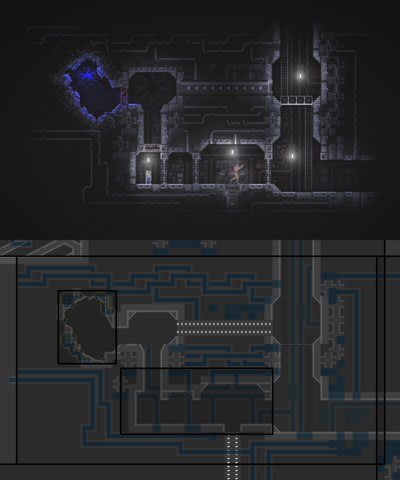
To edit the terrain, use the Stamp Brush B and select a tile from either the TileSet on the bottom right, or by copying one from the level itself with right click.
There are more tools, like the Terrain Brush T or the Bucket Fill Tool F, that can speed up the process.
To learn more, check the Tiled User Manual (Mind the version differences, as anything 1.9.0 or above is not relevant).
Changing tilesets
The texture of tiles used in a chamber is determined by the chamber properties. To change it, select the chamber, go to its Custom Properties and modify:
- FgTexture: The texture of foreground tiles
- BgTexture: The texture of background tiles
- OverrideFgGenerator: Set it to true to apply the texture set in FgTexture
- OverrideBgGenerator: Set it to true to apply the texture set in BgTexture
It is also possible to have multiple tilesets in one chamber by using Subchambers.
To create a subchamber, add a chamber and set "IsSubChamber" to true. Subchambers are used to change the texture of tiles in parts of a bigger chamber. Setting "IsSubChamber" to true on a normal chamber, without it being inside a bigger chamber, will result in a crash.
Changing music
Music played in a room, either during normal gameplay or during combat encounters, is set by the chamber properties.
- Music: Played during normal gameplay.
- MusicAction: Played during combat encounters.
Placing objects
Placing an object on the wrong layer will most likely cause a crash.
To see a full list of all objects, which layer they go in, descriptions and more, see List of Objects.
To enable color coding and autocomplete custom properties for all objects, go to View > Object Types Editor and select "Import". The file to import is named object_types.json, found in Carrion\Content\ObjectTypes.
Templates are used to add objects to levels. Grabbing an object from either UserContent\<projectname>\Templates or from another level in the same project directory is the main way to add one.
After loading a level in Tiled, an empty "Project" field will appear on the left. Right clicking on it will show an option to either "Add Folder to Project" or "Refresh Folders". Adding the UserContent\<projectname>\Templates folder will allow for adding objects into the level by dragging and dropping the template from the list on the left.
Another option is to use the Debug Map to copy and paste objects into the project. Copy the DebugMap into the UserContent\<projectname>\Levels folder to avoid any template errors, as copying objects from a level not in that folder will result in a crash.
Connecting objects
Carrion uses a custom configuration/scripting language (.cgs) to connect objects together. Scripts are placed in UserContent\<projectname>\Scripts.
To use a switch (tutorial_switch) to open a door (tutorial_door), the script would look like:
tutorial_switch -> tutorial_door;
#open and close tutorial_door with tutorial_switch
The script must match the name of the level and be in the Scripts folder to work. Errors in a .cgs script will stop the script from working, and an error message is sent to the console and gamelog.
Lines must end in a ; (semicolon), and typos will also make the script stop working entirely.
Modding
When loading a custom level, the game looks for any folders in UserContent\<projectname> before Carrion\Content. Creating similar folders, e.g. "Audio" or "Textures", makes changing assets without modifying the base game's assets directly possible.
Resources
Level Editor
On June 25, 2022, Tiled 1.9.0 replaced the "Type" field with "Class" on all data types, changing the way object properties were set. Any version above 1.8.6 does not work for Carrion level making.
- Tiled 1.8.6 (June 15, 2022)
Debug Map
A Map with (almost) all objects available in the files. Copy the level into UserContent\<projectname>\Levels to copy objects from the Debug Map into your level without template errors.
- Debug Map V9 by cuni (November 28, 2021)
Workshop Tutorial
- Official Workshop Tutorial on Steam
- Transcript
Dev Tools
An essential selection of tools used by the developers of Carrion to build the base game's content.
Lua Bindings
Videos
- CARRION Updated Mapping Tutorial - Basics by cuni
- Carrion MAPPING SCHOOL: TileSets by cuni
- Carrion MAPPING SCHOOL: Elevators by cuni
- Carrion MAPPING SCHOOL: Growing Tentacles by cuni
- Carrion MAPPING SCHOOL: How to open doors with Cameras (Sweep Events) by cuni
- (Somewhat Outdated) Carrion (Demo): How to create Custom Levels by cuni

